I’ve been messing around with various GIMP enhancement tools to see what they do and found the Retinex tool is great for pulling detail from images taken in low light conditions. I’m far from an expert at using GIMP, I tinker with GIMP so I can help my wife (an illustrator and amateur photographer) gain more from using GIMP.
The image below is the original image taken with my Nokia Lumia 620 Windows (Windows 8.1) Phone, nothing special about the phones camera, a standard 5MP camera. It’s not the best image and needed some work. Hmm, is GIMPing the equivalent of Photoshopping :-)
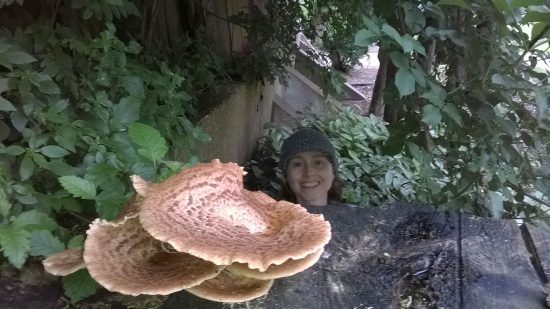
Original image before any GIMP enhancements.
I’m trying to take a photo of the fungus that’s growing on a tree while I’m stood on my tiptoes. We are under tree cover, so though it’s day time it had been raining and there was some cloud cover.
Photo Details (only included ones with values)
Dimensions : 2592×1456 pixels
Resolution : 72 DPI
Bit Depth : 24
Resolution : Unit 2
Color Representation : sRGB
F-stop : f/2.4
Exposure Time : 1/15 sec
ISO Speed : ISO-160
Exposure Bias : 0 step
Metering Mode : Average
Flash Mode : Flash, compulsory
Light Source : Unknown
White Balance : Auto
Digital Zoom : 1
Edited the image in GIMP and did the following.
Duplicated the image as a new layer (Layer > Duplicate Layer)
Set the top layer to – Mode : Overlay
Set the bottom layer to – Mode : Normal
I had two copies of the same image, the top image (top layer) will overlay over the bottom one. From the GIMP documentation this is what overlaying a layer does:
Overlay mode inverts the pixel value of the lower layer, multiplies it by two times the pixel value of the upper layer, adds that to the original pixel value of the lower layer, divides by 255, and then multiplies by the pixel value of the original lower layer and divides by 255 again. It darkens the image, but not as much as with “Multiply” mode.
I’m sure that’s as clear to you as it was to me :-)
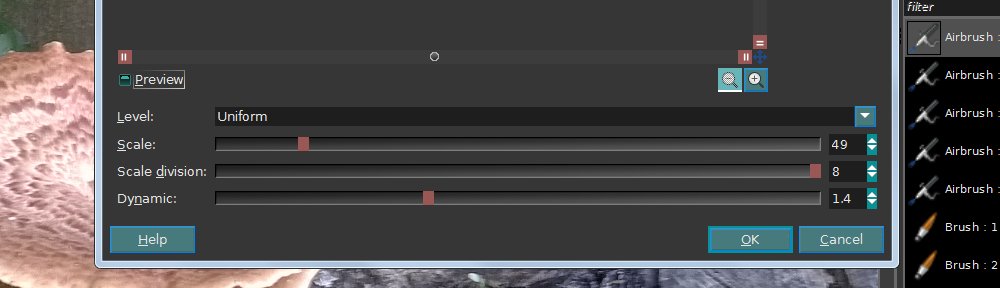
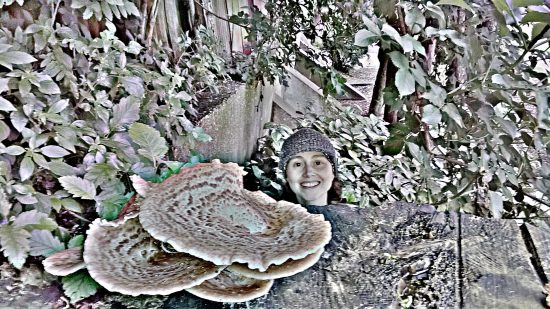
Anyway, I temporarily hid the bottom layer and to the top layer I used the Retinex Tool (Colors > Retinex…). You can see the settings I used in the image below.

GIMP Retinex Enhancement Settings
This resulted in the top layer having a lot of detail, but very bright.
GIMP Retinex Tool Ouput, Detailed, but Very Bright
After making the bottom layer visible again the end result is as follows.
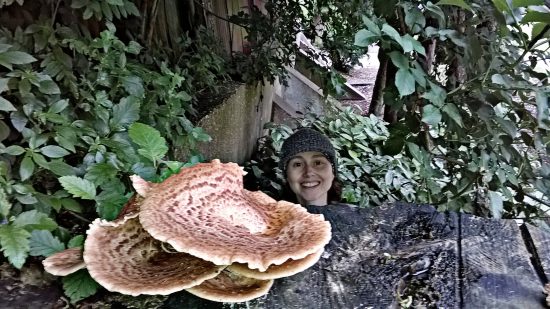
GIMP Retinex Enhancement End Result
Original image before any GIMP enhancements.
This is my first try with the GIMP retinex tool, I think the output is better than the original in some areas and not so much in others. In hindsight because this is an image from a phone I should have scaled the image back to around 1200px wide (~50% original size) as I think it would improve the end result for web usage.
I was right, 50% scaled version below.

GIMP Retinex Output Scaled 50%
David Law